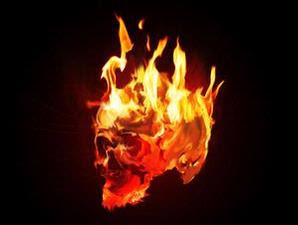
 The skull was burning like effects in science fiction movies is the theme this time digital imaging. Although a bit smelly horror, your results are guaranteed is very cool. How to make it not too difficult.
To create a cool effect of the skull on fire, you just need a few tools in Adobe Photoshop CS4. Smudge tool, plus a refined gradient tool and a little movement with the pointer like a painting. In addition, also provide images of the skull that can be made with a vector application such as CorelDRAW or Adobe Illustrator. No need to create a complex picture and details, a simple enough way skulls skull silhouette images presented here. Do not forget, is also drawing fire prepared a black background.
Was ready to start? Let's play.
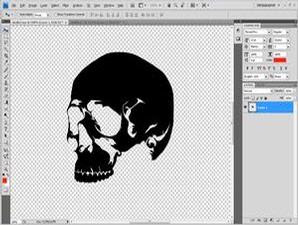
- Prepare a simple skull image as I making here. You can make it with another style, you know. Make a simple drawing, such as the silhouette. Use a black or white color as the base.
- Prepare the work area by drawing the desired size. Give the black color in the work area by pressing [Shift] + [F5] on your keyboard. Continue to choose [Black] on the menu "Use". If so, click [OK].
- Choose red and black, in the "Foreground color" and "Background color" in the toolbox. Select [Gradient Tool], then [Foreground to Background] and [Radial Gradient] on the menu in the toolbar gradation setting.
- Click-drag the pointer from the middle of the document outside the work area to appear red circle gradations. Continue with importing images into the work area of the skull. Give the name of the skull on the drawing layer.
- Press [Ctrl], then click on the layer "Skull" to appear around the image selection. Click the gradient tool again with fashion "Foreground to Background, but with yellow and red. Click-drag the pointer in the image of the skull.
- Press [Ctrl] + [D] to remove the selection. Enter the image of fire, and named the "Api1". Lower the value of this layer opacity to 80%. Continue by pressing [Ctrl] and click on the layer "Skull" again.
- Click the layer "Api1", then press [Shift] + [Ctrl] + [I]. Press the [Delete], so that the image of fire to form a skull image. To look dikobari fire, click [Smudge Tool]. Select the type of brush "Chalk" or "carcoal" in the menu "Brush".
- Press [Ctrl] + [D]. Asleep on the image layer "Api1" to form the blaze. Use a brush size variations. To increase or decrease the brush, use slidebar "Master Diameter" in the menu "Brush".
- Enter another fire images, and named the layer "Api2". Try drawing a lick or flames. Change the blending mode to [Screen] and position it at the top of the skull. Change the size to fit the skull.
- Press [Ctrl] + [T] until the box appears around the second fire. Press [Ctrl], then click-drag one corner of the box to adjust the form of fire with the skull. Continue with the other corner. If so, press [Enter] on the keyboard.
- The second fire was fast asleep with the Smudge tool as the previous step for forming the blaze. To form a dark-light illumination of the skull, use the [Dodge Tool] or [Burn Tool], and fell asleep on the necessary parts.
- Make sparks with [Brush Tool] type of hard red and small. Create a new layer and named "spark". Pulaskan on the outside of the skull, and then wipe the spark Smudge Tool.
- Combine all the layers. Click [Layer]> [Flatten Image]. To reinforce the color of fire, press [Ctrl] + [M]. Use the box "Curve" to confirm color. Use the preset [Linear Contrast] or [Strong Contrast], then click [OK].
Labels: Information Technology , Internet News , Photoshop , Software Guide
0 comments:
Post a Comment