Home | News | Android

Archive

. . . . . . . . . . . . . . . . . . . . . . .

Nexus One is Favorites Gadget Steve Wozniak (Apple founder)

Sunday, January 17, 2010

Steve Wozniak (Apple founder)SAN FRANCISCO - Who would have thought Steve Wozniak, Apple cofounder Steve Jobs but now even making phone made by Google's Nexus One, as the current choice. This was revealed Wozniak in an interview with NBC television network.

"The latest, and not a product developed by Apple, just out yesterday," Wozniak said when asked about his favorite gadgets such as the Telegraph quoted the site, Friday (15/1/2010). The answer refers to the Nexus One. In addition, he also has a Motorola Droid are also both working with the Android platform.

However, instead of praised Android platform. He admitted that he had to use Android-based smartphone since the first version came out but not satisfied. "I have some Android phone, which earlier did not satisfy me. Droid and Nexus One, including a great phone, but do not apply to all Android," he said.

In fact, Wozniak said hundreds of types of smartphones have a variety of brands including Motorola VIP phone from the 1990s that are not sold freely on the market. Surely, he promised to buy every new gadget that caught his attention. Wozniak claimed to have tried to make the BlackBerry as the main gadgets for everyday activities. However, again he was not too happy.

"Sometimes I bring a Droid at the waist and also Nexus One. At a certain moment I took my BlackBerry. The main phone I kept the iPhone," said Wozniak. Not only one iPhone will have but two.

When asked where the gadget is best thought there was not the best. According to him, it all depends on consumers' needs and abilities. Wozniak had even criticized the initial version of the iPhone does not support 3G, is not open to the developers, and often put to hack his iPhone itself in order to run various applications.


Labels:

Changing Windows Standard Fonts

There are several standard fonts used by Windows, the Arial and MS Sans Serif. Tahoma font used on the shell to Explorer in Windows, while the system default font such as the System Properties, Device Manager and other applications is MS Sans Serif.

Want to change these fonts? The way is not as easy as changing the font in Microsoft Word document. But, if you're already accustomed to playing with the registry, do not hard, really.
  1. Click "Start> Run ...", then type" regedt32.exe ".
  2. Go to the subkey "HKEY_LOCAL_MACHINE-SOFTWARE-Microsoft-Windows NT-CurrentVersion-FontSubstitutes".
  3. Double-click String Value MS Shell Dlg "to change the default font of the previous system using Microsoft Sans Serif.
  4. Change the Value Data it with another font type you want, provided that fonts are already installed on your Windows.
  5. Click "OK".
  6. Double-click to "String Value MS Shell Dlg 2".
  7. Change shell before using the font Arial with font type, such as Arial or Comic Sans MS. The rules remain the same as before, ie you define the font must have been installed in the operating system.
  8. Click "OK", then close the Registry Editor and restart the PC.
After you restart your computer, Windows will use the new font you have set for the font in the shell or in the system.

Do not forget, do a registry backup before you try this trick so you can return to the previous settings with ease. To manually system restore, went back to the subkey "HKEY_LOCAL_MACHINE-SOFTWARE-Microsoft-Windows NT-CurrentVersion-FontSubstitutes" in the registry, and then return the "Value Data MS Shell Dlg" Microsoft Sans Serif and "MS Shell Dlg 2" in Tahoma.


Labels:

Modifications Microsoft Word Shortcut

Modifications Microsoft Word ShortcutIf you click the icon [Open] or [Save] on the toolbar of Microsoft Word, comes the dialog window. In the middle, you can browse the disk to determine the location of the file. On the right side there is a preview of the document will be opened, while on the left side there is a shortcut to the Desktop, My Documents, History, Favorites, and Web Folders. Presence of a shortcut that allows us to quickly access a particular location.
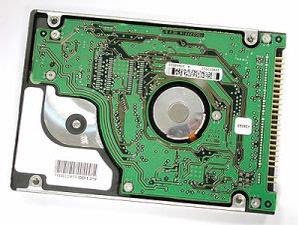
Unfortunately, documents to be saved or opened are not in the places of his shortcuts are done. Just delete the existing shortcut and replace it with a shortcut to the folder that is frequently used.

You can remove the shortcut through the registry like this:
  1. Run the Registry Editor.
  2. Go to KEY_CURRENT_USER key sub-Software-Microsoft-Office-9.0 Common-Open-Find-Places-StandardPlaces. Inside are five keys, ie Desktop, Favorites, My Document, Publishing, and Recent. Key that create the shortcut on the windows "Open / Save" on your Microsoft Word. Key Desktop, Favorites, and My Documents refers to the shortcut Desktop, Favorites, and My Documents, while referring to the key shortcut Publishing Web Folders, and refer to key shortcut Recent History.
  3. Say you want to remove the Web Folders shortcut. Go to the key Publishing. double-click the DWORD value named [Show], changing its value data to "0".
  4. Now try to open Microsoft Word and click the icon [Open] or [Save]. Supposedly, the Web folder shortcut is not there. To eliminate the other shortcuts, you can do so on other key key in accordance with the shortcut that you want to remove.
If you had been able to eliminate unnecessary shortcuts, so now let's learn to create their own shortcut that will refer to realize favorit.Untuk folder, open the Registry Editor again and follow these steps.
  1. Go to sub key HKEY_CURRENT_USER-Software-Microsoft-Office-9.0-Common-Open-Find-Places.
  2. Create a new key with the name "UserDefinedPlaces".
  3. In it create another key with the name, eg "shortcut1".
  4. Shortcut1 key in the string value is created with the name "Name", and fill its data value with the name of your choice. This name will appear on the Open or Save the window in Microsoft Word.
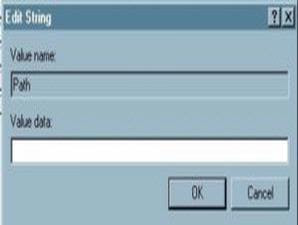
  5. Then create a string value again and this time give it the name "Path". Fill in the value of his data with the full address of the folder you want to create shortcut it.
  6. Try again to open the windows Open / Save, and the shortcut you made earlier will be seen there.
You can make your favorite shortcut is more than one. Need to be aware, however, a maximum of only five shortcuts that can appear on the windows Open / Save, already includes the standard shortcut from Microsft Word. So if you want to make a favorite shortcut, you must remove one of the standard keyboard shortcuts Microsoft Word. If you want to make more than one, of course you also have to remove the default shortcuts Word more than one.


Labels:

Modifications in the Shortcut Menu Context

You'll never find an application that includes the application shortcut in the context menu. Look at Winamp or Windows Media Player. They deliberately put the shortcut in the context menu so that access to a program so more quickly.

How do I create a shortcut like that? Well put on a registry.

Here's steps:
  1. Open the Registry Editor by typing "regedit" in the Start menu.
  2. Go to the sub key "HKEY_CLASSES_ROOT-*- shell".
  3. Right-click on the directory of the shell, then, from the context menu, select "New" followed by "Key". A new directory will be created and you can change the name as you wish. The name of this directory which will be shown when the context menu is displayed. Suppose the directory name of "entertainment".
  4. In the same way, create a new directory in the directory of entertainment. Give the name "Command" to this new directory. Click the directory "Command", then double click the name of binary data (default) located on the right. After the box "Edit String" appears, the contents of the location (Path) complete the application and the application name, format, and "% 1". Code "% 1" it is optional and serves to run the application automatically. Suppose the location is filled with C:-Program Files-Winamp-winamp.exe "% 1".
  5. Now it's time to reap results. Appropriate application example above, try right-clicking on the file with the MP3 format. Shortcut entertainment will be displayed in the context menu. Click on the shortcut and MP3 files that you select will be played.
To remove the context menu you just created, you can simply return to the sub key "HKEY_CLASSES_ROOT-*- shell", then delete all the keys you've ever made.


Labels:

Delete the applications that do not want to be removed

If you often try a free application, you must have experienced that the application is still listed in the list of Add or Remove Programs when you've removed from the system. Now, instead of struggling to install other applications to clean it, wash it out through the Registry Editor.

It's very easy.
  1. Open the Registry Editor window, then find the location "HKEY_LOCAL_MACHINE-SOFTWARE-Microsoft-Windows-CurrentVersion-Uninstall". This directory stores all the names in the application window Add or Remove Programs are stored in a directory.
  2. Find the name of the application you want to delete. After the meet, click the directory, then select "Delete" from the menu bar "Edit".
You can also other ways.
  1. Right-click the directory.
  2. after a context menu appears, select "Delete".
  3. Before closing the Registry Editor window, press the "F5" on your keyboard to update the contents of the registry.
  4. Without having to restart Windows, open the window of Add or Remove Programs, then look for the name of the original application is difficult to remove. Surely now gone.


Labels:

Opening folder in new window

As a computer user is often required to work with several files in two or more separate folder. If you have this, we are forced to move between folders in a Windows Explorer window.

When experiencing these conditions, so that the process can go faster, try the following trick.
  1. Run Registry Editor by typing regedit in the menu "Start".
  2. Go to the sub-key "My Computer-HKEY_LOCAL_MACHINE-SOFTWARE-Classes-Directory-shell-".
  3. Click the right mouse button on the right side window, then select "New > Key". Give the name "opennew".
  4. Double click (Default) which are in the right window, then fill it the Value data to "& Open in New Window".
  5. Click "OK".
  6. Click the right mouse button, then select "New> Key".
  7. Give the new key name with the name "command", then click the key to this point you are in the "My Computer-HKEY_LOCAL_LACHINE-SOFTWARE-Classes-Directory-opennew-shell-command".
  8. Fill in the Value Data (Default) to "explorer.exe / e,% 1".
  9. Click "OK".
  10. Close the Registry Editor and restart the PC.
From now on, you can explore the contents of the folder in a new window with ease. Simply right-click the folder in question, then click "Open in New Window".


Labels:

Tips Limiting Hard Disk Capacity

Tips Limiting Hard Disk CapacityThe available hard disk space is where the easy out. Various types of files and folders are likely to continue growing each time, plus the tendency of the file size growing.

In order to save money, you can use quotas feature of Windows. Basically, this feature works to give hard-disk space quota for each user. To use it, the partition must use the NTFS file system. After that, you can right-click the drive you want to set its quota. Then select the tab "Quota". Check "Enable Quota Management" to activate it. Then check also "Deny disk space to users exceeding quota limit".

Click the "Quota Entries" to regulate how much quota for each user. How, from this window, simply click the name of the user who wants to be given quotas. Then adjust the desired large quotas. For example, here is set quota of 100MB for the guest account with 80MB warning level. That is, if the guest user account to use more than 100MB space, then the window will pop up a warning that disk space is not enough anymore.

Another advantage of the quota, the label that shows the amount of hard disk space available will change depending on the user's quota. Back to the example above, if the guest user account is open My Computer, then the amount of disk space on the screen is only 100MB. So, as if his hard disk capacity is only 100MB, though it did not for it.

The use of quotas would be very helpful, especially for PCs that are used together. With the division of quotas, there is no longer expected to fight hard disk space quota, which in turn facilitate the administration of the system.


Labels:

Blogger Theme By:Google Android .